Uploading YARA Rules Using the Web UI
Use the Settings > YARA Rules page to manage your YARA rules. On this page you can search your local machine for custom YARA rules files and upload them to the appliance. Before you search, you can specify the file type. Additionally, you can view your files and the associated content types in a custom YARA rules table.
See About YARA Rules for information about how YARA rules are used and how they relate to threat management.
|
|
If you use a CM Series platform to upload a YARA rules file to an Malware Analysis appliance running Release 7.8.0 or newer, the CM Series platform uploads the YARA rules file to other managed Malware Analysisappliances in the same appliance group. |
Prerequisites
- An established connection between the Malware Analysis appliance and the Internet.
- You are logged in to the Web UI as an Admin or Operator access.
To upload a YARA rules file:
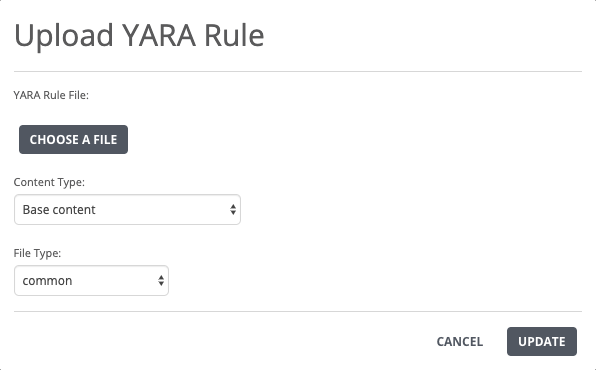
- Go to the Settings > YARA Rules page.
- Click Upload YARA File.
- Click Choose a File, then select the local YARA rule file you want to upload.
- In the Content Type drop-down list, select the content type to which you want to apply the YARA rule:
- Base content
- Active content
- Both (Base content + Active content)
- In the File Type drop-down list, select the file type to which you want to apply the YARA rule, or select Common if the rule applies to all file types.
-
Click Update to upload the YARA rule file.
If an invalid rule file is uploaded, or the selected file type does not match the contents of the YARA file, the Download File and the Download Error Log buttons appear. Use these buttons to download the invalid file and the error log.
To delete a YARA rule file:
- Go to the Settings > YARA Rules page.
- In the custom YARA rules table, locate the rule you want to delete.
- Select the box in the Delete column.
- Click Delete File.